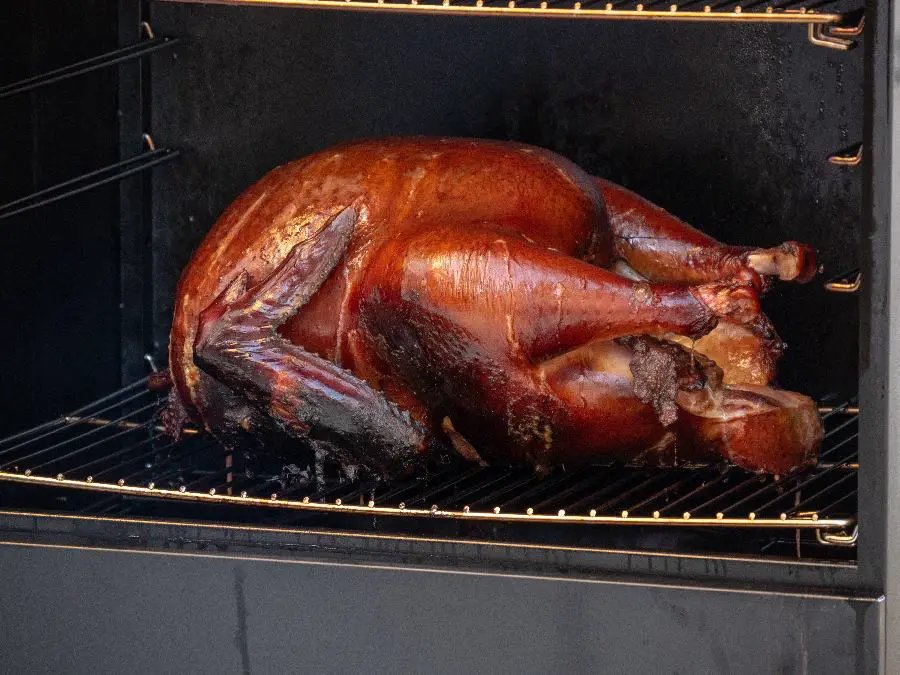
When smoking a turkey, everyone wants to know how long it will take to cook your bird. My best tip is that a good baseline to use is 35 minutes per pound at 240 degrees and an additional 20 minutes to rest your bird. You always need to check your bird’s internal temperature to make sure it is safe to eat.
In this article, we will cover some tips and tricks to have a great bird. We are going to start with some equipment basic then cover preparation, cooking steps, and my top tips.
Note: most links in this article are Amazon.com Affiliate links, see Affiliate Disclosure, thank you.
Smoker
A good smoker for a turkey needs to have two main characteristics, heat range and capacity. Additionally, a smoker that can hold a consistent temperature for a long time is a must when cooking a large bird such as a turkey.
A good heat range for cooking a turkey is from 240 to 275 degrees. You will get different results at different temperatures and changes in cooking time, and there will be more info on that in the tips.
A turkey requires a large amount of capacity, not because of weight but the size of a whole bird. An average 12-pound whole turkey can be almost 12 inches tall and 18 inches long.
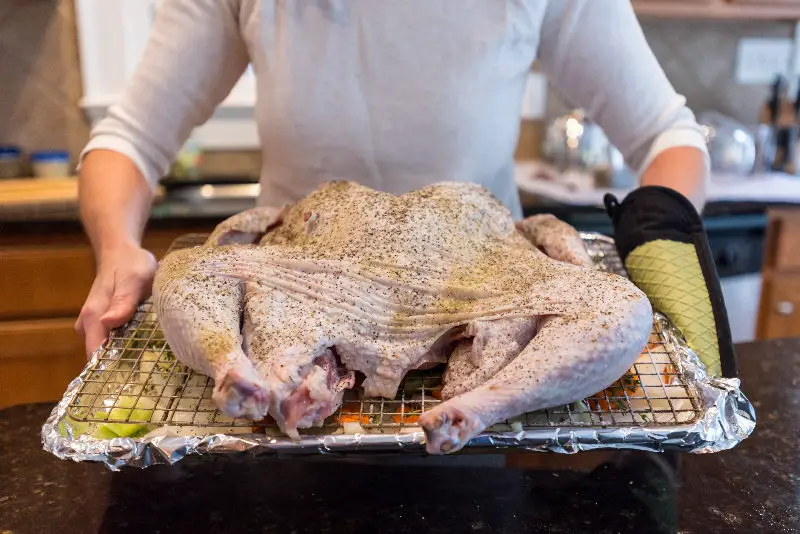
If you spatchcock your turkey, it maybe 24 inches wide, but thankfully it will be a lot shorter. So, an average box smoker or tube-style smoker is just not going to work, and we recommend a horizontal or commercial style unit.
Smoking Wood
There is a large array of choices when selecting wood to smoke a turkey. Traditionally most people recommend sticking with a poultry friendly wood like pecan. While pecan is a great choice with its mild nutty flavors a turkey could benefit from a bit stronger wood.
That being said sugar-maple is a bit stronger and has a more complex sweet flavor that matches well with any poultry. When using maple for poultry remember to keep your fire small and burning well to prevent bitter tastes.
Finally, If sugar maple is not an option then consider mixing woods. If you start your fire burning 50/50 hickory and applewood you will get an amazing flavor. Halfway through your cooking process switch to all apple for a great finish.
Thermometer
Everyone needs a good thermometer in their house for food safety. Smoking calls for something more, a leave-in probe thermometer.
I was watching TV one day, and Aaron Franklin said: “if you are lookin’, you ain’t cookin’.” I never open my oven, grill, or smoker unless I am performing a task, so no peaking. A probe thermometer can go into the deepest part of the meat, and it is like x-ray vision.
While there is a wide variety of leave-in probe thermometers, there are only two basic types corded and cordless. Cordless probe thermometers are cool and convenient with nothing to get in your way and loads of options including some units with Bluetooth phone connection.
But let’s be real, I am cheap, and I want a good thermometer that is going to do the job without breaking down. The ThermoPro digital dual probe is a good unit, and I have never had a problem getting good life out of their products (click here to see at Amazon.com).
Roaster pan
There are different schools of thought on using pans in your smoker, but this is the one time I always use a pan. I am a gravy person, and whether I use a roaster pan with basting liquid in it or a sheet pan with a grate to catch the dripping, I don’t want to lose a drop.
I prefer a roasting pan when I do a whole bird so I can baste it with the dripping and my added liquid. When you spatchcock a bird, you need to spread it out on a baking rack inside a half sheet pan, so you don’t lose a drop of that gray juice gold, lol.
Bucket
A five-gallon bucket is a great way to brine your bird, or a cooler can also work well for brining your bird. I always use a food-safe plastic bag in my bucket or cooler to brine the turkey. A plastic bag is a great way to make clean-up easy and prevent contamination.
Place a plastic bag inside the bucket, load the turkey, pour in the cold brine, seal, and pack with two bags of ice. The process with a cooler is the same, each step is a little more difficult than the bucket, but most coolers only need one bag of ice to stay cool during a twelve-hour brining process.
Resting place
You can always rest your bird under a tin foil tent, but I like to keep my bird as warm as I can without adding heat. My favorite place to rest my turkey is a clean, dry cooler.
Another excellent option for resting your bird is an unused oven, but this can be hard to come by during a dinner event.
Preparation
When cooking, the thing with the biggest payoff is normally preparation. The first step to having a great turkey for smoking is the same as baking, a nice cold soak in the brine.
The first step is to mix your brine.
- 2 gallons of water
- 2 cups pickling salt (or kosher)
- 4 tablespoons sage (or you can use store mix poultry seasoning)
I am a purist, so I keep it simple, but you can add extra spices if you like. Take two cups of the water and heat it in the microwave to dissolve the salt in then mix it with the remaining water and seasoning and chill.
Put your thawed, rinsed turkey in your bucket or cooler and add the chilled brine to soak overnight. Twelve hours is a good amount of time for a brine any longer, and you should rinse your bird and place it back in your refrigerator until you are ready for it.
Preheating your smoker is also an important step in the preparation. A smoker normally takes longer to preheat than an oven, so I like to allow 30 minutes for gas or electric smokers to have even heat and good smoke control. If you are using a wood or charcoal smoker getting the right fire can take longer so you should allow for the extra time you need.
Mix 4 tablespoons of olive oil (or melted butter) with 2 tablespoons of sage (or seasoning of your choice) and rub it under your turkey’s skin and then on the outside of the skin. Rest your bird for five minutes, and then it is time to get smokin’.
Cooking
Put your bird in the smoker and cook it, lol, not really. First, place your turkey on the roaster pan then insert your temperature probe in the thickest part of the thigh and try not to touch the bone.
Now, put your bird in the smoker and add any cooking liquid. Try not to open your smoker for three hours and then you can start basting your bird every 30 minutes until done.
Tips
- Food safety is my first tip. The FDA says poultry should be cooked to a 165 degrees internal temperature. Here is a link to the FDA temperature PDF https://www.fda.gov/media/93628/download. Additionally, you need to keep your Turkey under 40 degrees until you are ready to cook it and get it above 140 degrees within a four-hour window to prevent bacteria growth. Finally, don’t cross-contaminate your workspace, raw turkey juices contain bacteria that will multiply at room temperature and can make you very sick or worse.
- Your bird will continue to cook for ten to fifteen minutes after removed from the smoker. Normally, you will see an internal temperature increase of 7 to 10 degrees in the last ten minutes of cooking so pull that bird early and watch the temperature while your bird rests for a juicy bird.
- Up your smoker’s temperature for the last thirty minutes to 275 degrees if your turkey’s skin is not as crispy as you would like. And, if it is getting too crispy loosely place a large sheet of foil over the top of the turkey. Coat the foil with cooking spray before placing it on your turkey to prevent it from sticking.
- Don’t stuff your bird when you smoke it. Because you will be cooking at a lower temperature than an oven stuffing a bird can add hours to cooking time allowing bacteria to grow, and that is not good. An option to stuffing your bird is placing a few moist herbs inside or sliced citrus like oranges to offset the smokie flavors.
- Place the tube like this one from a stainless-steel turkey baster in your turkey. The tube will allow heat to freely flow through the turkey from the inside out (here is a link to Amazon).
- Put a small amount of liquid in your roaster pan even if you don’t plan on making gravy. Add liquid will help with having a moist bird, and if you put cooking spray on your pan first, it can help with cleanup.
- Always brine your bird for eight to twelve hours before cooking for a moist final product. Some store-bought turkeys have brine liquid injected which should be marked on the label. You should limit your brine time to eight hours on these.
- Use the same spices in all steps of your process. When you eat your bird, you want the spices you choose to come through clearly. So, if you are not using a store-bought poultry seasoning consider mixing your seasonings in a bowl or an empty shaker bottle to use in each step along the way and even for an extra dash on top.
- Pickling salt is the best salt to use in brines because it dissolves easily. Kosher is also a good choice because it is light and flakey. Any none iodized salt can be put in a food processor or spice grinder to get the same results as pickling salt.
- If you want to speed up your cooking time start by spatchcocking your bird, Spatchcocking can be done simply with and pair of high-quality kitchen shears. Cut along both sides of the backbone and then you can place the bird flat when you cook it. Flattening my bird has cut my cooking time down by more than 25%.
- Choose your wood to match your season and your final desired flavor goals. If you want a strong earthy flavor chose hickory or oak to go with sage or poultry seasoning. For a mild almost sweet flavor use a fruitwood like cherry or apple, which goes well with citrus slice stuffing.

Bonus Tip
Add thick orange zest and the juice of the zested oranges to your brine, and it works great along with orange slice stuffing. On a side note, it is the only way to start a whole smoked duck.
Conclusion
Starting with preparation and carrying the same flavors all the way through will make for a great meal. That being said, cooking is very subjective. You should always cook to please your family, friends, and yourself.
Enjoy!

