

Smoking your steaks can add a bunch of flavors to the meat. While grilling and baking are common options, learning how to make steaks in an electric smoker can be the real secret to a flavorful, juicy, and moist steak.
When you smoke any meat, the slow cooking process gives it a beautiful, tender flavor that most people find irresistible. From all the quick things to smoke in a smoker, steak is the most delicious and protein-rich food to rustle up.
Note: most links in this article are Amazon.com Affiliate links, see Affiliate Disclosure, thank you.
Using master-built electric smokers for steaks has become a recent practice. For one, they offer a flexible way to cook your food that requires less sauce and less heat. They also prevent moisture loss by treating the food with smoky fumes and steam inside it. This way, you’re less likely to baste the meat with fats and sauces.
The result? Delicious, succulent flavors perfectly seeped into every single bite of that smoked meat. Whether you’re looking for unique party foods or a warm, comforting dinner recipe, smoking steaks on a master-built electric smoker is one of the best ways to enjoy a festive meal.
Here are the awesome benefits of using a master-built electric smoker that will definitely impel you to invest in one too!
Click here to read our article How To Use A Masterbuilt Smoker: A Beginners Guide
1. Perfect for Beginners
Electric smokers are self-sufficient and require very little monitoring. This makes them an ideal choice for beginners who are still new to the cooking process. It doesn’t matter what you’re cooking – from steaks to casseroles – using an electric smoker requires little experience to achieve top-notch results.
2. Super-Safe to Use
People who live in condos or small apartments can safely and effortlessly cook food in an electric smoker. There are no risks of any flare-ups, sparks, or other risks linked with propane. As long as the power is plugged properly, there’s nothing that you have to worry about.
3. Energy-Efficient
If you’re wary of the electricity bill, then rest assured, an electric smoker is extremely energy-efficient. It doesn’t take that long to heat up and retains the heat very well, which makes it an ideal choice to cook extensive meals.
4. Easy to Clean and Maintain
Unlike charcoal smokers that need thorough cleaning every now and then, electric smokers are rather easy to maintain. There is no charcoal residue or ash, and the only thing that needs cleaning is the grease on the grill. All you need is a baking soda and water concoction to dissolve that gunk, and you’re good to go!
5. Extremely Affordable
Another compelling reason why you should be using electric smokers is that it is super-affordable. If you were to compare it to other cooking methods, a smoker will be able to cook all your favorite foods on a lesser budget.
Whether you’re a beginner at using electric smokers or are looking for a heart steak recipe, here is a step-by-step guide to smoke your steak.
What You Need
| Boneless steak |
| Boneless steak |
| A Master-built Electric Smoker |
| Flavored wood chips |
| Thermometer |
1. Choosing a Good Cut
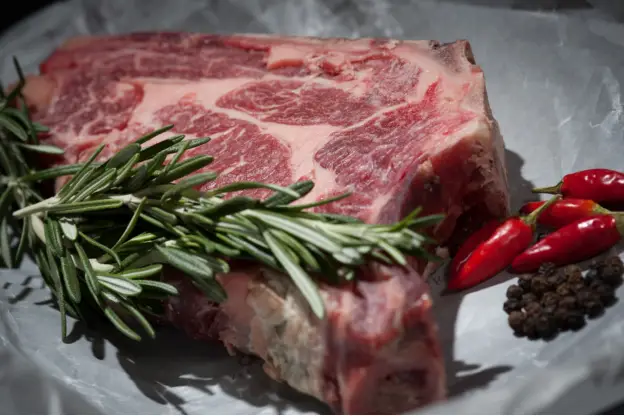
Choosing the right cut is the most crucial step of the smoking process. It doesn’t matter how flavorful the marinade is; if you’re using the wrong cut, the result would be a dry, rubbery steak. And, you certainly don’t want that.
Seasoning your steak is important, but it only works to enhance the complexity and texture of the meat. Hence, if you’ve picked a bad meat cut, the results will be nothing short of disappointing. Nonetheless, that doesn’t mean you can’t try your hand at smoking meat.
A boneless rib-eye is soft, succulent, and moist enough to withstand an electric smoker. You can also use a filet mignon, but rib-eye steaks produce the best flavor. It’s preferable if you buy the steak fresh from a butcher instead of the grocery store. Pick the “choice” steaks that go perfectly on the grill and in the smoker. Or choose “prime” beef rib-eye that has the highest amount of marbling.
Make sure the cut is about one-inch think with a bright, red color. The second thing you need to look for is the marbling. Most people choose a steak with the least amount of fat. However, the marbling is essentially what gives the steak its unrivaled flavor and juices. Therefore, as a rule, always look for thin streaks of fat running through the meat for the best pick.
2. Preparing the Marinade
Good cuts don’t really need marinating, but there isn’t a hard and fast rule. After you’ve bought a nice cut, keep it in the fridge, and in the meanwhile, prepare the marinade. Ideally, you can use all your favorite spices and play around with the flavors. However, if you’re searching for a specific recipe, then here’s a chef’s favorite, super quick and easy rib-eye marinade. You will need:
| 2 Tbsp Olive oil |
| 2 Tbsp Worcestershire sauce |
| 2 Tbsp Balsamic Vinegar |
| 2 Tbsp Soy Sauce |
| 2 tsp minced garlic |
| 1 tsp minced ginger |
| 1 tsp red pepper child flakes |
| 1 tsp Dijon mustard |
| Salt and pepper to taste |
Thoroughly mix all the ingredients and set them aside. If you’re not using a marinade, simply sprinkle generous amounts of salt and pepper on the steak.
If you prefer a dry rub, CLICK HERE to read our article on Dry Rubs For Beef.
3. Bring Your Steak to Room Temperature
You may feel like skipping this step and directly placing the meat in the smoker. However, it’s super-important for your steak not to be frozen or too cold before you start cooking it. Steaks aren’t smoked at extremely high temperatures anyway; therefore, a cold cut will disrupt the cooking process.
Our suggestion is to leave the meat out an hour before you pop it in the smoker. Leaving it for longer may invite bacteria, so stick to an hour or less for beef steaks. If you’re only marinating the meat and not cooking it, then keeping it in the fridge is fine.
The marinade is full of acidic juices that work to tenderize the meat, so you won’t need to soften it up before smoking. If you’re cooking the steak the same day, make sure it rests in the fridge for at least 4 hours. If not, let it rest overnight before cooking the next day for the best taste.
4. Add the Wood Chips to the Smoker
Now, it’s time to add the wood chips that will be the fuel for the smoke. Make sure you’re using solid, hardwood chips like mesquite, pecan, apple, hickory, or birch. Softwoods like pine and fir tend to burn fast and create toxic smoke.
You should add a small amount of wood chips before switching them on – when the smoker is cold. Simply, pull out the tube and place the chips in it. Once the tube is half full, slide it back, and revolve the handle counter-clockwise for the chips to drop into the internal wood chip burning tray.
If you’re confused about how many wood chips to use as you go through the cooking process, we suggest half a cup every 30 to 40 minutes. Adding wood chips in this manor should provide constant smoke during the cooking process. If the smoker stops producing smoke for more than 5 minutes, throw in the next batch.
Also, never over smoke your steak. If you overdo it, your food can turn out bitter. Each time you use your Masterbuilt electric smoker, you will get a better idea of how much smoke is the perfect amount for you.
5. Turn On the Master-built Electric Smoker for Preheating
If you’re using your electric smoker for the first time, make sure to season it before cooking. Unlike charcoal smokers, electric smokers don’t have to be monitored closely. You can allow the meat to cook slowly by setting the time and temperature.
After you’ve cleaned and set up the smoker, press the power button to switch on the smoker. This will put it on standby mode and it will only start to preheat when you set up the timer and temperature.
Since this is an electric smoker, you must ensure the smoker is properly plugged in. We recommend plugging your Masterbuilt smoker directly into an outdoor plugin. However, if you need to run an extension cord we recommend an outdoor rated 12 GA to get the proper amount of amperage.
Preheat the smoker for 45 minutes before you place the steak inside.
6. Set the Cooking Temperature
Setting the right temperature is crucial to ensure that your steak comes out moist, tender, and juicy. If the setting is too low, your meat won’t cook all the way to the end. If it’s too high, you might just end up with a burnt, unappetizing steak.
Therefore, in order to cook the perfect steak, the temperature you need is 225 Degrees F. In fact, even when you’re cooking fish or pork, this is the ideal setting to cook the flesh thoroughly.
7. Refill the Woodchips and the Smoker’s Water Pan
If you think the first batch of wood chips has stopped producing smoke, add in another half cup of wood chips. However, be careful not to add too many wood chips at once, as an excess of smoke will impact the texture and quality of the steak.
Refill the smoker’s water pan. This will help produce enough steam to keep the meat soft and moist. Throughout the cooking process, you need to be mindful of the wood chips and the smoker’s water pan. These little things can affect your steak the most.
8. Add in the Meat
If your marinated steak has been in the fridge, make sure to keep it out for at least 15 minutes before placing it inside the smoker. Now that the smoker is preheated and producing heaps of smoke, you can add in the meat. Place the steak on the top grill rack of the smoker. This is the ideal place for the smoke to engulf the meat and cook it thoroughly.
Throughout the process, keep adding more wood chips if you think the smoke is subsiding. Use your judgment to see if the smoke isn’t enough, and add half a cup of wood chips. The temperature will rise slightly when you add in another batch, which is completely normal. It’s only a temporary hike, and will go back to the original setting after a while.
9. This is the Time to Sauce it Up!
If you want to spice things up a bit, this is the perfect time to add extra sauce to your steak. The delicious smoky fumes, the bubbling marinade, and the tender meat are all ready for an extra dose of flavor.
You can add some chipotle sauce, barbecue sauce, or some more olive oil for extra juiciness. This should be done at least 45 minutes before you take the meat out of the smoker. This saucy secret is an instant taste-enhancer and makes the steak infinitely more delicious.
Final thoughts!
We hope this step-by-step on how to make steaks in an electric smoker will help you on your journey to a delicious smokey steak. In this article, we covered the Masterbuilt electric smoker but these steps will work great with any smoker.
When using a different smoker, consider temperature, time, and smoke production as key factors in producing a great smoked steak.
Enjoy!