

When you start with a new smoker, it is always nice to have a few pointers. You might want to enter the smoking hobby on a budget if you are a beginner. The Chargriller Smokin’ Pro is a budget-friendly starter smoker that most beginners can afford.
However, because of its price point, it is not built with thick metals or high-end features. But not to worry, with the tips in this article and some practice, anyone can smoke great food.
Note: most links in this article are Amazon.com Affiliate links, see Affiliate Disclosure, thank you.
Overview of the Chargriller Smokin’ Pro E1224 Offset Smoker
The Chargriller Smokin’ Pro E1224 is a budget-friendly offset smoker. As a typical offset smoker, it has a firebox on the side to generate heat and smoke. Food is placed in the main chamber or barrel to cook and absorb the smoky flavors.
Air flows into the vent on the side of the firebox to feed the fire. Smoke and heat flow into the main chamber from the firebox. Finally, exhaust flows out of the main chamber chimney.
Because this is a budget-friendly smoker, there are a lot of modifications that can help. In the spirit of things, all the modifications I suggest are budget-friendly. Also, most of these tips and tricks will help any offset smoker.
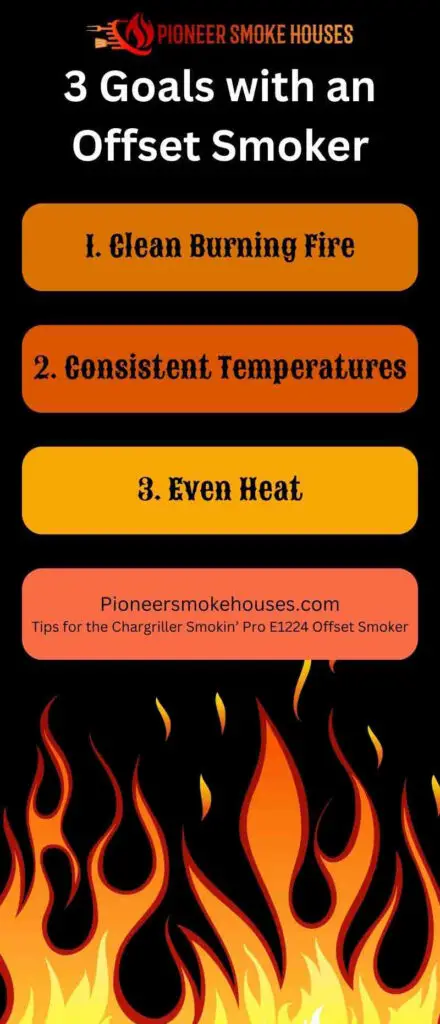
There are three main goals with an offset smoker, or any smoker.
- Clean burning fire.
- Consistent smoker temperatures
- Even heat throughout the main chamber.
Of course, other goals might be important to you, like extending burn time. However, if you solve these three issues first, you will be on a soundtrack for great food.
Char-Griller Smoker Mods and Tips
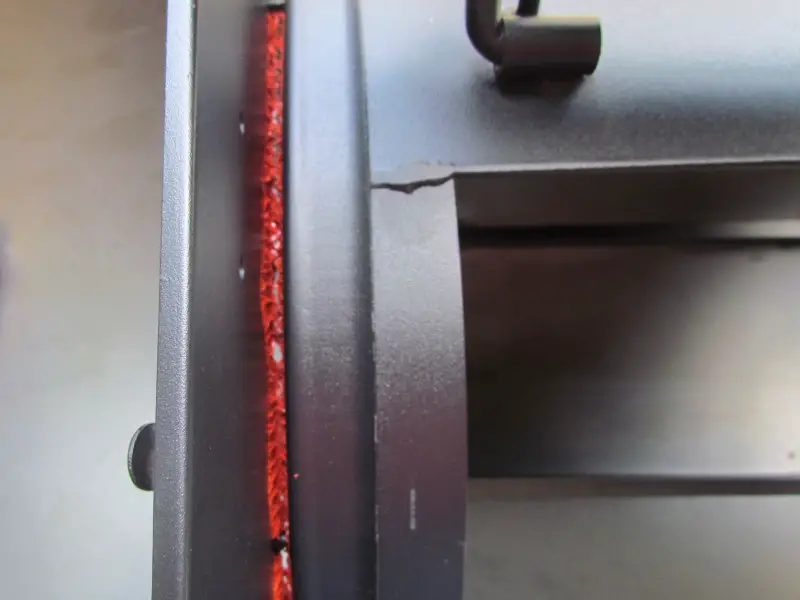
1. Seal the connection between your firebox and your cooking chamber when assembling your Chargriller Smokin’ Pro.
Good airflow from the firebox to the cooking chamber is the most crucial part of the smoker’s performance. Some cracks or gaps around doors and vents will allow for the minimum airflow for your smoker to operate appropriately.
When mounting the firebox, a bead of caulking around the opening can provide a great seal. We prefer Lava Lock RTV650 sealer because it is made exactly for this purpose.
Check out our Review of the Chargriller E1224 Smokin’ Pro
2. Provide airflow around the coals in the firebox.
You can do this with a charcoal basket (purchased or homemade). Another option is to place used heavy-duty grates in a v pattern, which helps the ashes fall away as it burns.
Start by flipping over the firebox charcoal base grate. Then use the firebox grilling grates to form a V pattern sideways in the firebox. The air will flow freely from the intake vent to the cooking chamber,
In the picture below, you can see a used grill grate from a Traeger 20 that was cut to custom fit in the firebox. Because the charcoal base grate was custom fit, flipping it over was not necessary, but doing so can increase the airflow under the burning coals.
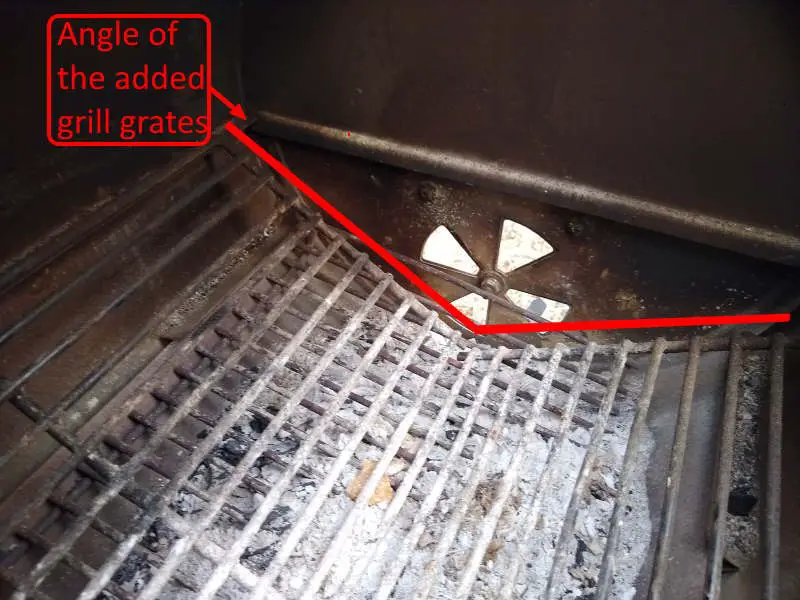
If you don’t have a used grate, you can cut a generic replacement grate to fit the same as the picture.
3. Leave the vents wide open when lighting your fire.
When you start, you will have both lids open, but as soon as the charcoal is lit and in place, close both lids and ensure both vents are wide open to encourage airflow.
The wide-open vents will allow full combustion of your charcoal or wood blocks. Also, this will promote good airflow through the smoker, then you can back the vents down when you reach your target temperature.
4. Reduce vents when your smoker is 25 degrees below the desired temperature, starting with the air intake.
Typically, I run the smoke stack vent around 50% and tune the airflow by adjusting the air input. Because the Chargriller smokin pro is not a sealed drum, there will always be some airflow, so leaving the stack partially open will promote your desired flow.
If you close the vent completely, smoke will leak out in gaps around the cooking chamber, which could result in uneven temperatures and smoke levels.
5. When your firebox starts to run out of charcoal, move the remaining charcoal toward the air intake vent and refill the empty space with unlit charcoal.
When adding the charcoal, ensure the lit charcoal touches the unlit charcoal. Close the lid ASAP, so the temperature stabilizes.
Additionally, if the temperature drops, add a handful of one-inch wood chunks on top of the lit charcoal and blow until they light up. The burning wood chip will provide an instant jump in temperature and an extra wood flavor to your food.
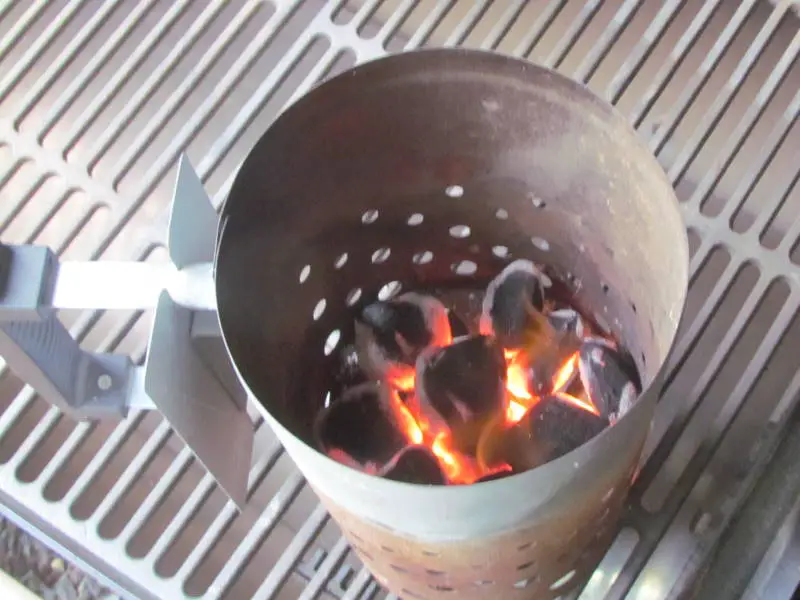
6. Prelight coals and ensures they are burning well before adding them to your firebox.
Using your tongs, you can add a few charcoals at a time to your smoker so you don’t go over your desired temperature. Place the lit charcoals as close to the air vent as possible and still be on with your other burning charcoals.
Adding lit charcoal is a great way to recover temperature without getting dirty smoke in your cooking chamber. A charcoal chimney is one great way to prelight charcoal, and another is a small grill.
7. Add a tuning plate, baffle, or manifold of some sort.
When heat and smoke enter the cooking chamber of the Chargriller Smokin’ Pro, it rises to the top of the chamber and flows across to exit out the chimney. With a tuning plate, the heat and smoke can be directed to the middle of the cooking chamber and evenly released through a series of vents.
With the Chargriller Smokin’ Pro, you can modify the included charcoal burning tray by adding longer bolts to the grill body, flipping the charcoal try over, and cutting or drilling holes in the charcoal tray to even out the heat and smoke flow.
You can buy tuning plates online, but I like using sheet pans and cutting them to fit. Do the biscuit test to decide where to add holes to your tuning plate to even out the heat flow.
8. Don’t add large pieces of wood to your fire.
If you add larger pieces of wood to your smoker, you will end up with dirty smoke and temperature spikes. Anytime you add fuel to your smoker, it will smolder when liting producing dirty smoke that can result in bitter food.
Once a large piece of wood is burning well, it can be hard to control the temperature, producing temperature spikes that can result in dry food. The best way to prevent drying out your meat is to add pieces of wood one at a time or prelight them in a separate grill.
The Chargriller Smokin’ Pro firebox is average or slightly smaller, so try to add small wood splits or chunks to the fire. The perfect size wood split for the Chargriller Smokin Pro is eight inches long, one inch wide, and one inch tall.
Of course, those measurements are for laying the wood split across the fire. If you plan on placing your wood with the charcoal bed, we recommend chunks that are only 4 inches long and a touch thicker.
9. When using briquettes, add 6 every 20 minutes.
If you use briquettes, try to add a set amount at a preset time. Make a note of the details so you can see the results and maintain a steady temperature. Start with the 6 briquettes every 20 minutes formula and adjust it from there.
First, blow a bit of the ash off the lit burning coals. Then, place your 6 unlit briquettes directly on top of the lit briquettes.
Always use a trusted brand of briquettes that perform consistently, so you can set the amount and time to add them. We like Kingsford briquettes, but many professionals prefer B&B briquettes.
10. Monitor the temperature on the cooking surface with an additional thermometer.
The Chargriller Smokin’ Pro stock thermometer is at the top of the cooking chamber, not where your food is located. To get a good idea of the cooking surface temperature, you will need a separate thermometer or thermometers.
We prefer a wired probe suspended slightly above the grate on the firebox side (right); this should measure the highest temperature. However, placing the tip of probe thermometers in a grill mat will give good temperature readings, but avoid touching the tip on metal surfaces.
Also, adding additional fixed thermometers to the cooking chamber lid can be helpful, but every thermometer should be calibrated.
11. Add firebricks or lava rock to your smoke to increase thermal mass.
The walls of the Chargrill Smokin’Pro are not heavy gauge metal, so they don’t retain much heat. Thicker metals and large objects will retain heat once preheated.
Most fire bricks are 4 inches by 9 inches, so 6 bricks can be placed in the bottom of your cooking chamber. Leave an inch or more between each brick, allowing hot air to flow around the bricks.
Once the bricks are at full temperature, you will notice a faster temperature recovery time when you open and close the smoker. Don’t use non-fire-rated materials, as the air pockets can explode.
You can purchase fire bricks at most home stores or online with this link.
Final thoughts
All the tips in the world can not help you more than practice. Start by maintaining 250 degrees for as long as possible, which is a useful temperature. After you master that temperature, move on to other popular cooking temperatures, like 225 or 300 degrees.
After temperature control, practice correcting smoke issues. A quick solution to clear up dirty smoke can save your cook and result in tasty food, even when you lightly season your food.
Don’t forget that you should season every smoker, and the CHarGriller Smokin’ Pro is no exception. Check out our article How to Season Char-Griller E1224 Smokin’ Pro.