

BBQ is one of the oldest methods of cooking known, and it dates back 1.8 million years. As soon as mankind discovered fire and learned how to use it, they figured out how to barbeque their favorite meat options as well. Today, fortunately, we don’t have to deal with primitive sticks and stones when smoking meat.
Instead, using a smoker such as the Weber Smokey Mountain Cooker is the preferred cooking option. Such a smoker can cook your food to perfection, but only if you use it right. What should you know when using the Weber Smokey Mountain Cooker?
How does it work, and is it different from any other kind of smoker? Keep reading and learn more about how cookers work.
Note: most links in this article are Amazon.com Affiliate links, see Affiliate Disclosure, thank you.
What You Need To Know About Using the Weber Smokey Mountain Cooker
The first thing you should know about cooking with smokers is that they should come with a user’s manual. This will tell you the basics of how to use the cooker and how to go about cooking BBQ food with it. To start preparing your cooker, you will need to make sure that it is ready to house and burn some charcoal.
To start, make sure that the charcoal grate near the bottom of the smoker is in place. This grate is essentially the platform that will hold the charcoal in place. Before you start up any smokers for BBQ parties, you will want to do a test smoke.
A test smoke is exactly what it sounds like: it involves turning on the smoker and allowing it to burn without any food in it. This will ensure that the smoker works as it’s supposed to, and you won’t have to worry about ruining any food if the smoker happens to be faulty.
Additionally, this test smoke will burn off any residue from manufacturing and season the smoker with a light coat of smokey goodness.
Click here for our full Review of Weber Smokey Mountain Cooker Smoker 18.5 Inch.
The Details
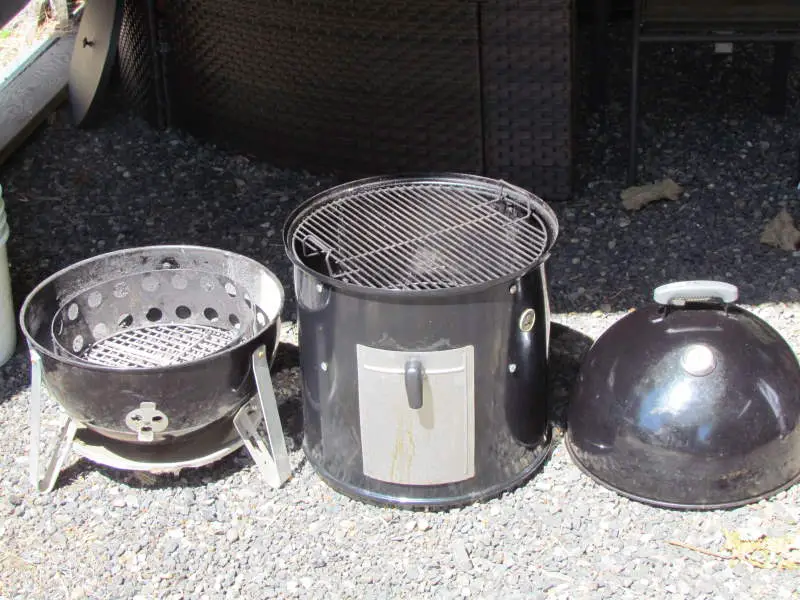
The Weber Smokey Mountain Cooker is a vertical flow smoker that performs similar to a drum smoker. This smoker is basically three pieces, the base, the body or cent section, and the dome lid.
The base section sits on the ground and is where the charcoal is burned. There are three legs and three air input vents spread around this bowl-shaped section. Inside is a charcoal grate, fire ring, and a pan that doubles as a catch and heat deflector on the bottom.
The body section has clips on the inside wall to hold the water bowl and the two cooking grates. On the outside, there is a temperature probe passthrough grommet and a charcoal access door.
The dome lid has a temperature-resistant handle, thermometer, and output vent. There is a lip around the edge of the body for the dome lid to rest in during use.
With two cooking grates, you have roughly 500 square inches of cooking surface, but you might need to go a little less around the edges so your food doesn’t burn on the sides. Also, the bottom food grate is slightly smaller Than the top 18-inch grate.
We refer to the Weber Smokey Mountain Cooker as the pork butt master smoker, but most people call it the WSM. We think it is best suited for large pork butts or three small pork shoulders per shelf. Additionally, our results have proven time and time again that there is nothing that gives better results for a pork butt.
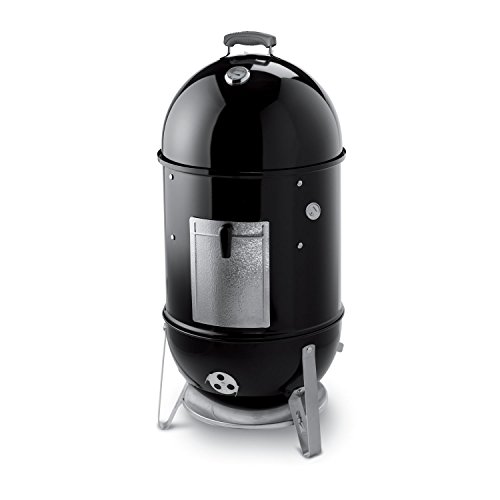
Weber Smokey Mountain Cooker
This Weber 18-inch smoker is a vertical smoker that takes vent control to the next level. Its three adjustable vents at the base of the smoker can manage temperature perfectly.
Firing up the Smoker
Once you have tested and seasoned your smoker, it will be time for your first cook. A typical cook on the WSM is around twelve hours at 225 degrees. To get twelve hours at 225 degrees on the 18-inch model, you must fill the charcoal ring level with charcoal briquettes.
Start by filling the outside edge of the charcoal ring one piece at a time in a vertical pattern so air will easily pass through. If you want to place 3 or 4 chunks of wood in the smoker, this would be a good time, but keep each piece 4 inches or more apart.
Then dump in briquettes until the basket is full, level with the top of the ring. Keep in mind that you will need a lot of charcoal if you plan on smoking food for hours at a time.
For example, if you plan on smoking brisket, you’ll need around 15 or 16 hours. This, of course, will require a lot of coal. You don’t want to keep adding charcoal late in the smoking process, as this will only interfere with the smoker’s steady temperature.
Instead, it is best to add all the charcoal you need in the beginning so you don’t need to add any more at a later point. If you fill the charcoal chamber as much as possible, the smoker should be able to burn for around 18 hours. Doing this will also keep the internal temperature around 225°F.
While you can certainly adjust the temperature if you want, this temperature is perfect for smoking meat for several hours at a time. Of course, if you don’t need your smoker to be burning for 18 hours straight, all you need to do is add less charcoal in the beginning. The less you add, the less time the smoker will burn for.
Time to Light the Fire
If you have a chimney starter to go along with your smoker, don’t hesitate to use it. A chimney starter is very useful as it allows you to easily lite a bunch of charcoal briquettes.
If you don’t have a chimney starter, don’t fret, as you can simply arrange your charcoal briquettes in the shape of a pyramid with a fire starter in the middle to get more or less the same effect. Once the coals are burning and all have white edges, add the smoker’s charcoal chamber into the mix and put the hot coals inside the chamber.
Suppose you plan to cook low and slow, place all the burning coals in a small pile directly in the middle of your charcoal bed. If you plan to cook at temperatures above 275 degrees, you must spread the coals across the charcoal bed. Doing this is essential as it will allow the smoker to reach a hot and even temperature.
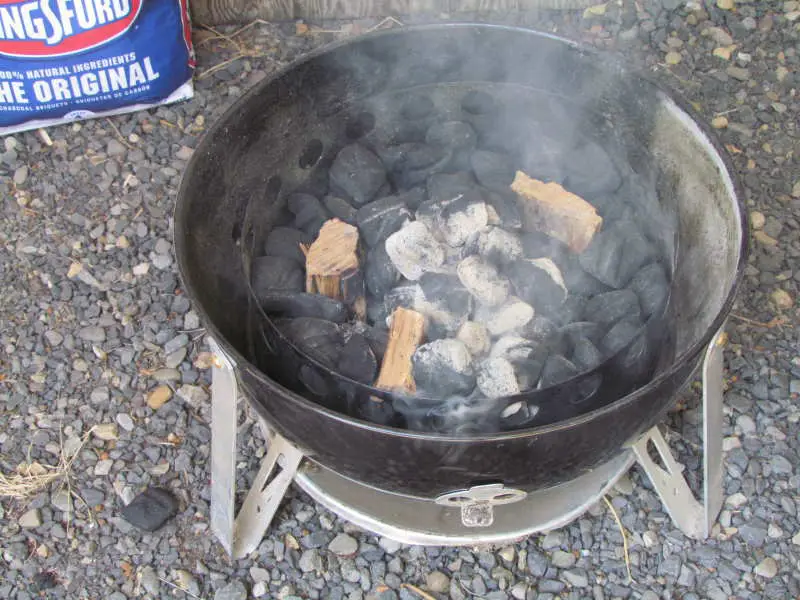
Once you add all the charcoal briquettes you want, ensure you don’t add your food to the smoker immediately. Instead, you should be patient and closely watch the charcoal. At a certain point, the briquettes will develop a light dusting of gray ash.
Managing the Air Vents
After you have loaded your charcoal and have a small pile of about 12 briquettes burning well, then you can assemble your smoker. Your next goal is to properly manage your air vent to get the perfect temperature and burn rate.
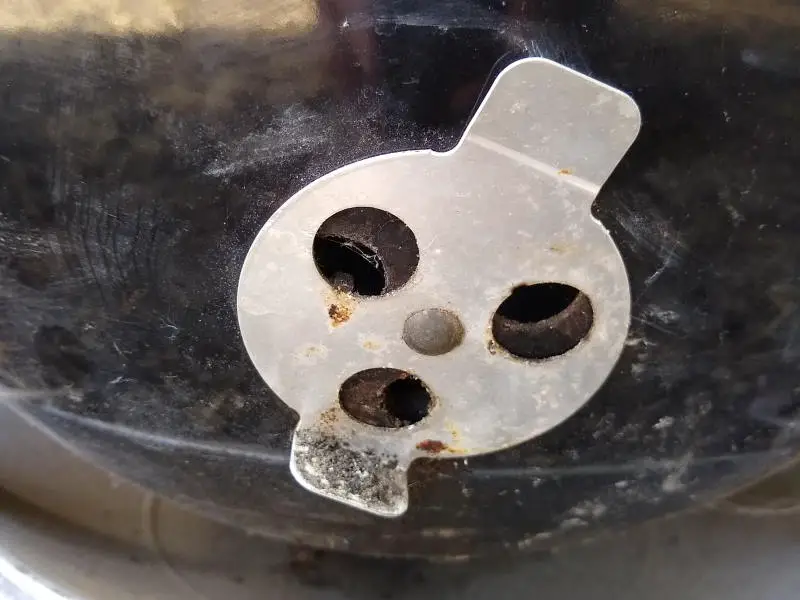
The Weber Smokey Mountain has three intake air vents around the bottom and one output on the top. Each one of these vents needs to be properly adjusted for best control.
When you first assemble your smoker, all the vents should be open 100% for five minutes to allow even heating and create good upward airflow. Once the smoker’s body has heated up, it will be time to close the vents, but there is a science to how you do it.
Start by closing all the intake vents on the bottom, then slowly open the vent on the very front about halfway. Wait about five minutes for the charcoal burn direction to change and the temperature to balance out.
The top vent is key to balancing the airflow, which will control the temperature and the smokey flavor. Start by closing the top vent halfway, then carefully watch the temperature.
Typically, for long slow cooks, your goal temperature is 225 degrees. After 15 minutes, if your temperature is too low, open the front intake vent and top vent to 75%, then wait for five minutes. If your temperature is still too low, open both vents to 100%, but only for a few minutes.
Note: opening the front intake vent will cause the charcoal to burn in a straight line toward the open vent. If you need to add more charcoal later in the cook, there will be an empty hole next to that vent for an easy reload.
What You Need to Know About the Water Pan
At that point, the smoker will be hot enough for you to add whatever food you have on hand. However, before you do that, you won’t want to forget about the water pan.
The water pan is very important as it ensures that the smoker won’t get too hot. You need to make sure that the water pan has warm water in it; otherwise, it won’t be able to do a good job of conducting the smoker’s heat. The water pan should rest in the middle section of the smoker along with the cooking grate.
The water pan, of course, should be below the cooking grate. The water pan should hold about a gallon of water, or you can fill it until three-fourths of the pan is filled with water. Adding the water will bring down the smoker’s temperature in no time, but it won’t completely cool down the smoker, of course.
When you first start the smoker, it will be too hot, so adding the water to the water pan will fix this problem. At that point, don’t forget to close all of the vents on the bottom of the smoker and then close the lid over the top of the smoker. You’ll have to wait a few minutes for the water pan to work its magic.
Eventually, if you watch the smoker’s thermometer, you should notice the temperature dropping until it gets around 300°F. Then, you can get ready to add your food.
Note: many people prefer not to use the water pan. Typical, I fill the pan with lava rocks to maintain even heat, while other people use sand. Then, you need to cover the pan loosely with foil, or a generic pizza pan will work nicely.
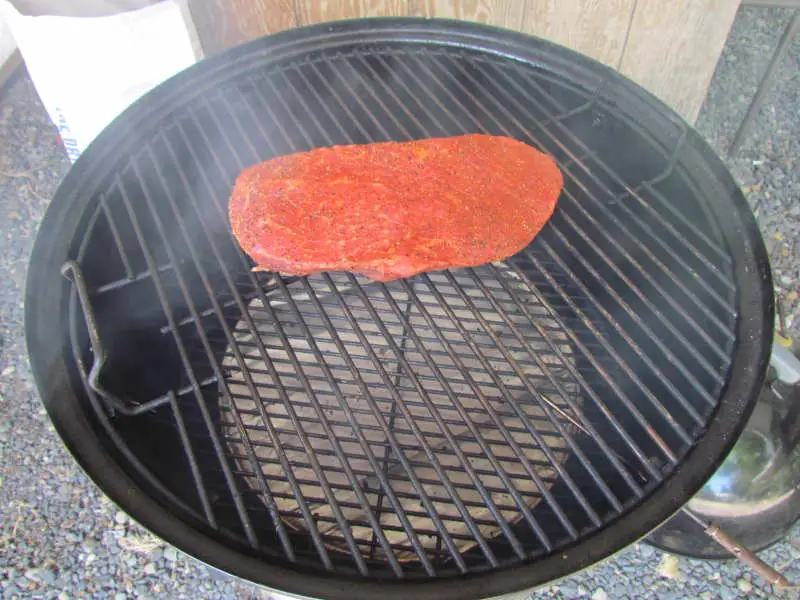
This is what you want to wait for.
Adding the Food to the Smoker
Adding food to your smoker is, of course, the most exciting part of smoking any kind of food, but be sure that you’re not too quick about it. When adding your food, you’ll have to decide whether you want to cook your food on the higher or lower grate. Keep in mind that the top grate tends to be much hotter than the lower grate.
For that reason, you’ll only want to reserve the higher grate for food items that only need a few hours to cook. On the other hand, the lower grate is a bit cooler, so whatever food you put there will take longer to cook. The lower grate is perfect for cuts of meat that are usually tough such as ribs and shoulders.
But what if you have several very large pieces of meat? Unfortunately, there isn’t much you can do about this and you’ll likely have to put the meat on both grates and wait for both of them to be done. Once you add all the food, put the lid back over the smoker and wait.
After Adding the Food
Adding the meat will cool down the smoker’s internal temperature, but only slightly. Be sure to maintain the vents closely for the next thirty minutes by adjusting the vent as described above.
You may need to close the bottom vent if the smoker gets too hot. Be sure to keep the smoker’s top vent partially open at all times. This will ensure that excess smoke will leave through the top of the smoker. It will also maintain the smoker’s internal temperature, but only if you have the bottom vents closed simultaneously.
This will prevent air from entering the smoker while allowing smoke to leave. If you forget to open the top vent, your food will taste far too smokey and not in a good way.
After an hour or so, you can add some wood chips or chunks for some extra flavor if you want to. However, when cooking with charcoal, less smoke is almost always better.
Be sure to check the smoker’s temperature every 10 minutes or so. After the smoker is on for some time, you can check it less frequently. Also, don’t forget to refill the water pan every few hours and flip the meat halfway through the cooking process.
As long as you do all that, you should be left with some delicious food at the end of the smoking process.
All About Using a Smoker
Using a smoker doesn’t have to be as difficult as you might think, although there are some things you need to keep in mind. Always add enough charcoal in the beginning, so you don’t need to add more later. Also, don’t forget to do a test smoke to season the inside of your new smoker.
Make sure that the water pan is ready to go and that all the vents are ready too. To learn more, click here.