
Being able to answer how does an electric smoker work can transform the way you create meals. From adding more flavor to having exceptional control over the way your meat cooks, there are plenty of reasons why these appliances are as popular as they are. At first, an electric smoker might seem daunting; however, knowing how they work can teach you how to make the most out of yours.
How Does an Electric Smoker Work?
Depending on the type of cook you are, it can be just as easy to learn about your electric smoker through trial and error. Though, we highly recommend learning the ins and outs of the appliance so that you can make the perfect meal every time. With this detailed breakdown, you’ll know precisely what to do to craft artisan meats with rich flavor every time.
Note: most links in this article are Amazon.com Affiliate links, see Affiliate Disclosure, thank you.
The Parts of an Electric Smoker
There are five main components to your smoker that you’ll find either in or on the body of the main unit. These include:
1. Smoker Body
The central premise behind an electric smoker is to use heat and smoke to create a smoky flavor that is unlike anything you’d experience with a traditional barbecue. With that said, you’ll want to make sure the unit has a high-quality build designed to trap in all of the flavors.
The body should be easily able to handle high temperatures and be well-insulated until you open the door. For the most straightforward use, we highly recommend finding a body that allows you to easily access other essential components, such as the wood chip bowl, without opening the door.
In situations where you may have to replace the wood chips, you won’t want to open the door and release all of the precious flavors. This issue can lead to dull tasting food that doesn’t truly capture the essence of a smoker.
2. Digital Control Pad
The digital control pad on your unit is, by far, one of the most critical parts, as it controls everything from timers to the temperature of the smoker. Without a digital control pad, you’re far more likely to char your meat or be stuck with wood chips that seemingly never burn. In most cases, you’ll be able to find this part on the front or the side of the main body.
Digital control pads can vary in their high-tech features, though it’s best if you find one that allows you to set the temperature, manage cooking times, and add timers if you desire. The best thing you can do is read the instruction manual for your specific model to learn about any innovative digital features it may have.
Note: There are still a few electric smokers that have analog controls or no controls. The analog smokers have a dial or nob control that you turn to an estimated heat setting then adjust during operation to get your ideal setting. No control smokers are what we also call plug and go; the manufacturer has designed them to run at a preset to burn wood chips and maintain an average temperature range.
3. Drip Tray
When you’re using a regular barbecue and the fat from your meat drips onto the flame source, it can cause significant and unexpected flames. Unfortunately, this can cause your meat or vegetables to be seared beyond repair, creating the well-known backyard barbecue burnt taste. With a drip tray, all of these flame enticing ingredients will be routed away when using a smoker.
High-end smokers will surely include a drip tray as it helps to collect all of the fat and juices from the meat you’re using. The best part is that you can use these leftovers to create stellar gravies that will have a similar smoky flavor.
Another outstanding job of the drip tray is to make sure the unit’s temperature stays where you have it set. Instead of allowing fats to increase the heat by accelerating the burning of your wood chips, the fat will be brought directly into the metal pan for cleaning or further use.
4. Water Bowl
Maintaining a healthy level of moisture inside of your smoker is key to preventing your meat from drying out within the first few minutes. This point is where the water bowl becomes most useful, as it helps to add a little bit of humidity while your meat or vegetables are smoking.
Ideally, water bowls should be able to handle at least two cups of water for more enormous chunks of meat to ensure they don’t dry out quickly. It’s also important to note that the higher temperatures you run the smoker at, the drier the inside will be. You may have to adjust the amount of available water depending on if it’s running hot or not.
5. Wood Chips Bowl
Every cooking appliance needs a source of power, and aside from electricity, your smoker is going to need wood chips to create heat and smoke. This component is why a lot of people invest in smokers, as the wood chips are responsible for the delectable and unmatchable smoky flavor of meat cooked in these appliances.
You’ll want to ensure the wood chips that you prefer to use can sit comfortably in the bowl and burn thoroughly. Smokers don’t cook meat as quickly as barbecues, which means you should always be prepared to have to fill the wood chips bowl at least once or twice during the cooking process.
As mentioned, this component should be easily accessible without having to open the front door and release any flavor while lowering temperatures. You may also want to consider opting for a wood chips bowl that is large enough to hold two cups of wood chips so that you won’t have to continually re-up the chips.
The Smoker’s Cooking Process
With a clear idea of smoker components, it’s easy to see the basics of how it works. Simply put, when plugged in and turned on, the digital controller sets the heat at which the wood chips burn. The burning process increases the temperature inside of the unit as well as envelopes the meat in smoke until it reaches your desired level of cook.
For a more thorough explanation, let’s go over these steps.
Step #1: Prepare the Meat
The very first thing you’ll need to do is prepare your meat, as it will make the smoking process far more manageable. It can be a great idea to find a meat guide that lets you know what temperature to cook certain meats depending on their size and type. At this point, you’ll want to apply any seasonings or rubs to your meat that will work correctly with the wood chips you have selected.
Step #2: Prepare the Smoker
When you’re letting the meat rest before cooking, this is a great time to get your smoker prepared. Most units are created intuitively so that you can adjust the interior racks to accommodate the amount of food you’re making. Once done, you can plug the unit into an electric outlet.
At this point, let your smoker run for thirty minutes or more. It is a good idea to re-season your smoker a bit before each use because this can reduce bad odors and improve the overall taste. Additionally, preheating your smoker is a great idea and will result in cleaner smoke, also improving taste.
We also recommend filling the wood chip bowl at this time with one to two cups of chips, depending on the amount of meat you’ll cook. If you know it’s going to be a long cook time, you’ll want to add chips to the maximum level.
Step #3: Cook the Meat
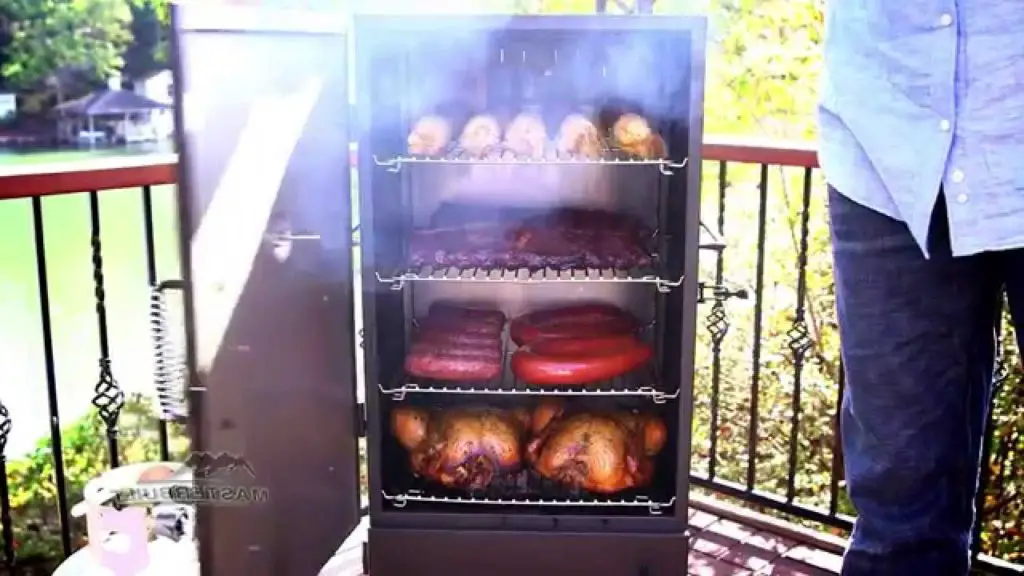
At this point, you’ve prepared everything, and it’s time for you to put the meat inside the smoker. You’ll want to make sure every piece is spread out so that the smoke can be distributed evenly along the surface as well as penetrate the inner layers. If slabs of meat are touching each other, they may not cook as thoroughly.
If you are cooking foods of different sizes, thicknesses, or densities, you will want to position the densest foods on the top shelf, like carrots or potatoes. Your next priority would be to arrange the largest then thickest pieces as high as possible to absorb as much smoke and heat as possible. Finally, you should place temperature-sensitive food like cheese as low as possible to reduce the chance of melting.
Once you’ve arranged everything appropriately, you can close the smoker door and turn to your digital controller. On your controller, you’ll want to set specific temperatures based on the size and type of meat you’re using, which is where the meat guide comes in handy. You can also set timers for how long you want the meat to be smoked.
One rule of thumb to take note of is that you’re going to want to cook your meat to a specific temperature, rather than use the timing feature. You might find that some smokers work slower than others or that some meats take longer to cook than expected. It’s always best if you have an internal meat thermometer in your smoker that will allow you to see the internal temperature at all times.
With these unique devices, before you start the smoker, you insert the thermometer into the slab of meat. The built-in tool will then give you a temperature reading on the outside of the base unit so that you are always aware of how cooked your meat is. It’s a fantastic idea, as you won’t have to open and close the smoker every time you want to check the temperature of your brisket, for example.
Step #4: Maintain the Wood Chips
As earlier discussed, there is a chance that you’ll have to replace your wood chips depending on how long you’re smoking your meat or vegetables. Most electric smokers are quite economical, as the internal temperature is managed by the built-in thermostat, rather than the burning of chips. However, if you prefer a smokier flavor, you’ll always want to make sure you have new wood to burn.
You’ll get a good idea of how quickly your smoker will go through the materials the more often you use it. Some units only require one cup, whereas others may need two or three. One of the best things about using smokers is that you learn something new about your unit every time you use it.
Step #5: Finish the Meat
Once your meat has reached your desired internal temperature, you can follow through with turning the smoker off and removing the meat. You can then continue with the final preparations, such as letting the meat rest before serving.
Step #6: Clean the Smoker
Smokers should be cleaned after every use because all of the built-up residues can negatively affect the way it cooks in the future. It’s always a good idea to allow the smoker to cool before you start cleaning.
You’ll also need to make sure you take away any ash, moisture, and grease, as it can promote rusting inside of the unit. If you don’t clean the unit after every use, you’ll find the taste of your smoked foods will significantly diminish, as well as the lifespan of the smoker.
Tips for Owning a Smoker
Smokers, electric ones, in particular, are built in a way that is incredibly user-friendly and fun to have at your disposal. You can guarantee you’ll prefer using this appliance over your traditional barbecue, especially when hosting a backyard bash. Knowing how smokers work is one step of the process, but you’ll also need these essential tips to remember while owning one.
1. Season Your Smoker
Similar to a cast iron pan, seasoning your smoker can be a great way to remove residue from manufacturing and create a protective coating on the inner components. Not all units will need it, though, but the larger your smoker, the more seasoning it may require. Regardless of whether you own propane, pellet, or electric smokers, you’ll want to cook it empty upon its arrival.
Firing your new unit up before putting any food in it is a great way to learn how the device works before putting it to the actual test. Additionally, you can burn away residue on the metal that can be unhealthy and will inevitably affect the flavor of your food.
Seasoning is simple with these necessary steps:
- Coat the inside of your smoker with an oil, such as canola oil. You must make sure all of the metal components are coated thoroughly.
- Ensure the wood chip box (smoker box) and water pan are in place while plugging the smoker into its socket.
- Turn the smoker on by using the push-to-start button and adjust the temperature to 275 degrees. You can also use the digital controller to set a timer for two hours.
- After the two hours have elapsed, turn off the smoker and give it time to cool. Once it is cooled, your brand new smoker is seasoned and ready to be used.
2. Know the Difference between Wood Chips vs. Wood Pellets
For beginners, you might assume that you can easily use both wood chips and pellets in your electric smoker, which isn’t always the case. This point is especially true if the instructions for your smoker explicitly state not to use pellets in place of chips.
Since wood pellets are substantially smaller in size, they are far more likely to combust when you put them in a wood chip smoker. Unfortunately, this can lead to an absurd amount of smoke that will damage the integrity of the meat and also put you at risk of starting a fire. It’s always a good idea to stick with the fuel source recommended by your manufacturer to avoid hazards.
Some smoker enthusiasts suggest you can use pellets in a wood chip smoker by encasing them in aluminum foil. Once packaged, you can poke holes in the foil for ventilation that will help to control the rate of combustion. When you’re starting, it’s best to protect the integrity of your smoker by using the recommended fuel sources.
3. Control Vent Positions
Electric smokers make it quite simple to control the amount of smoke inside the unit. If you have to work with vents, though, it can be confusing at first.
For most meats, your best bet is to leave the vent on your smoker open, as this will envelop the meat in plenty of smoke while preventing the buildup of creosote. Creosote is a compound found in smoke, and if too much builds on your meat, it can create a sour taste.
The general rule of thumb is always to leave the vent open, unless you need to build the internal temperature of your smoker, in which case, it should be closed. For electric smokers, we recommend starting your smoker with the vent fully open and heavy smoke. Then when the smoke slows down, you can close your vent to increase the temperature in your smoker.
4. Use Aluminum Foil for Easier Cleanup
This point may seem rather straightforward, but we promise that using aluminum foil will change the way you see your smoker. Cleaning up after cooking meals for hours can be more than enough for one to handle. However, if you rely on aluminum foil while cooking your meat, you can make the cleanup process even simpler.
If you prefer to keep your meat directly on the racks, we recommend putting aluminum foil in your drip pan or creating a foil tray on your bottom rack. It will help to make collecting fats simpler and reduce the amount of time you’ll have to spend washing it out.
Final Thoughts
Answering how does an electric smoker work? can help you to make some of the juiciest and most flavorful dishes yet. With a relatively basic design that anyone can get the hang of, these user-friendly appliances make a fantastic gift for yourself or a family member. We highly recommend getting your hands on one, as they will transform the way you enjoy all types of meat.