

Did you know that the first indigenous tribes that Christopher Columbus encountered in Hispaniola were cooking meat over an indirect flame? Smoking meat is a culinary art form that can elevate your barbecue experience to new heights. Whether you’re a beginner or have dabbled in smoking before, mastering the art of using a smoker can be an incredibly rewarding journey.
In this blog post, we’ll explore some valuable smoker tips and tricks to help beginners maximize their smoker and create mouthwatering, smoky masterpieces.
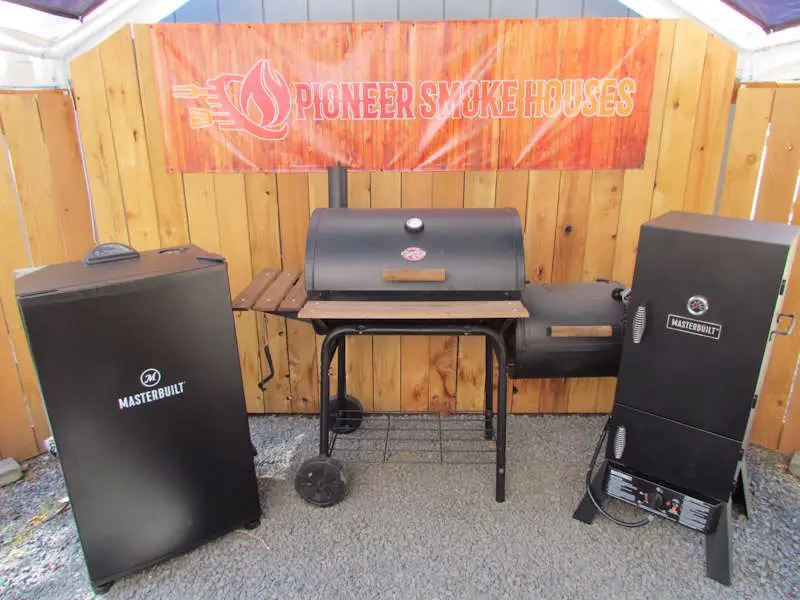
Choose the Right Smoker
Selecting the right smoker is crucial for achieving optimal results. The three most common types of smokers are charcoal smokers, electric smokers, and wood pellet smokers.
Charcoal smokers have the most authentic smoked meat flavor. However, charcoal smokers are the most time-consuming, requiring constant fire maintenance. Also, this type of smoker has a learning curve that takes time to get consistent results. I recommend that people cook a lot of budget-friendly thick-cut steaks or small roasts such as Chuck to really get the hang of fire management.
Electric smokers are easy to use and very versatile for smoking everything from brisket to cheese. Because electric smokers smolder wood chips rather than burning a fire many people miss that classic BBQ taste. For some meats electric smokers can be used for a pre-smoke and then finished on a charcoal or gas grill. We have a large depth of Masterbuilt electric smoker tips that can help guide you on your journey.
Pellet smokers are considered a happy medium because they are easy to use but add a light smoky flavor. The latest generation of pellet smokers can easily reach 600°F and go as low as 180°F on the smoke setting, this makes them very versatile. However, it is a must to keep a pellet smoke dry and clean, especially the fire-burning pot, or the fire might not burn correctly.
Each smoker type has its pros and cons, so choose the one that aligns with your preferences and cooking style.
Start With the Right Cuts of Meat
Certain cuts, such as pork shoulder, beef brisket, and ribs, are more forgiving and tend to yield excellent results. These cuts have a higher fat content and connective tissue, which break down slowly during the smoking process, resulting in tender and flavorful meat.
The time required to break down the connective tissue can vary depending on the cut. A brisket typically requires ten or more hours to break down the connective tissue at 235°F, but larger briskets might require as many as 24 hours.
Ribs can be smoked in four hours with a wonderful smokey taste and a firm bite. For a soft rack of smokey ribs a six hour cook, like 321, might be a better process.
Pork Should is by far one of the best beginner meats because of the high fat content and low amount of connective tissue. During the long process of smoking the pork the fat helps keep it moist and adds a lot of flavor.
As a beginner, Chuck can be a great choice because it’s budget-friendly, has connective tissue, medium fat content, and great beef flavor. Select a small roast or extra thick steaks to start your journey and cook it exactly like a brisket.
Tri-tip is also a great choice when it is on sale. However, because of the lower fat content, it can dry out so wrap it in foil after it reaches 160°F.
Not all cuts of meat are created equal when it comes to smoking. Research different cuts and choose the ones that suit your taste and skill level.
Patience Is Key
Low and slow is the mantra of successful smoking. Maintain a consistent temperature, usually between 225°F and 275°F, and allow the meat to cook gradually, absorbing the smoky flavors, breaking down the connective tissue, and rendering the fat.
Connective tissue breaks down best when it reaches temperatures of around 200°F for 30 minutes or more. However, over 210°F internal temperature will quickly force the fats out of your meat causing it to dry out.
The 225°F cooking temperature allows the cook to slowly approach the perfect internal temperature without racing past it. Wrapping meat with heavy-duty foil after it reaches 160°F can help seal in the fat and juices, this is called the “Texas Crutch.”
Rushing the process can lead to tough and underwhelming results. Remember, good things come to those who wait!
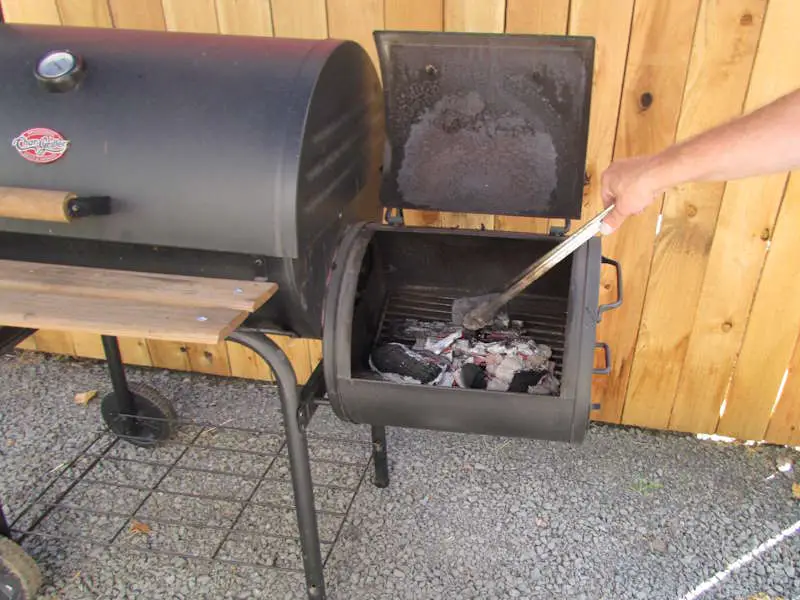
Master the Art of Fire Management
If using a charcoal or wood smoker, learning how to control the fire by adjusting the airflow and adding fuel when necessary is crucial for a successful smoking session. Keep a close eye on the temperature and make small adjustments as needed.
We have listed the top smoking tips for fire management below.
- Add small pieces of wood, lump charcoal, or briquettes in regular increments, like every 30 minutes.
- Prelight your fuel in a separate fire, like a mini Weber kettle. Lighting your fuel and then adding it will keep your temperature stable and result in cleaner smoke.
- Slide your burning fuel toward the air intake as you maintain the firebox. The closer the burning coals are to the air vent the better they will burn and the more even the smoker heat will be.
- Invest in a reliable thermometer to monitor the smoker’s temperature.
Remember the goal is to avoid temperature spikes and get clear blue smoke through the entire smoke.
Smoking Techniques
There are several smoking techniques to smoke your meat effectively. Two of them are particularly useful – low and slow and hot and fast.
The traditional method, low and slow, involves smoking your meat on low heat for an extended period of time (around 225°F) to ensure the smoke infuses well in your meat. This technique works particularly well with meats that have a lot of connective tissue (e.g., brisket, pork shoulder, and ribs), which can melt at this temperature.
On the other hand, hot and fast will require a higher smoking temperature (300°F) and only take a few hours to cook. This technique is particularly great for smaller cuts of meat that can dry out easily with low and slow. For example, chicken can become rubbery if left in your smoker for too long.
However, large cuts like brisket can also be done hot and fast. Consider injecting seasoned beef broth throughout the brisket and remove from the heat 5 to 10°F sooner than normal to account for extra carryover cooking.
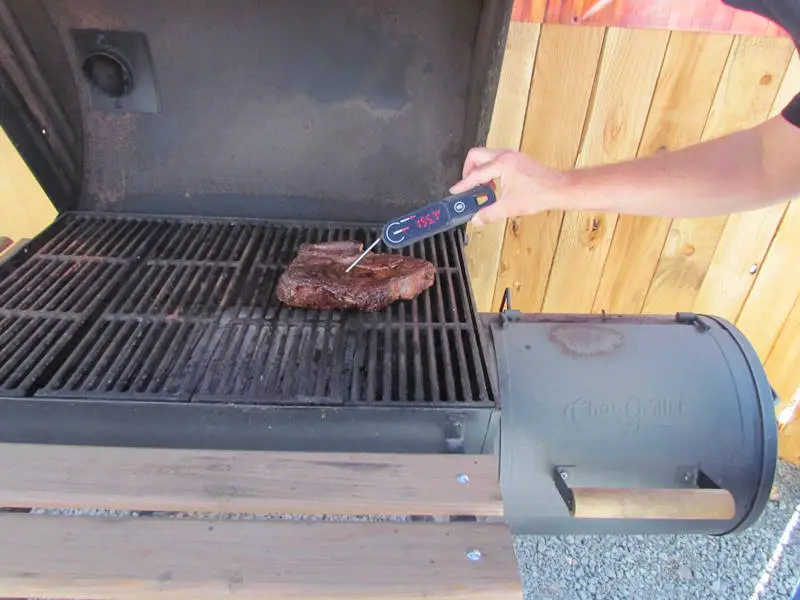
Of course, there are more techniques to consider, and for a steak reverse sear is king. simply smoke your steak to rare and then sear it on both sides to a medium rare finish.
Pre-searing is a great technique for a prime rib roast. Sear all sides of the roast on a hot charcoal fire or in a cast iron pan. Next, transfer the roast to a 225°F preheated smoker until it reaches an internal temperature of 130°F then rest for 15 minutes before slicing.
If a cook can master low and slow and hot and fast that is a great place to start.
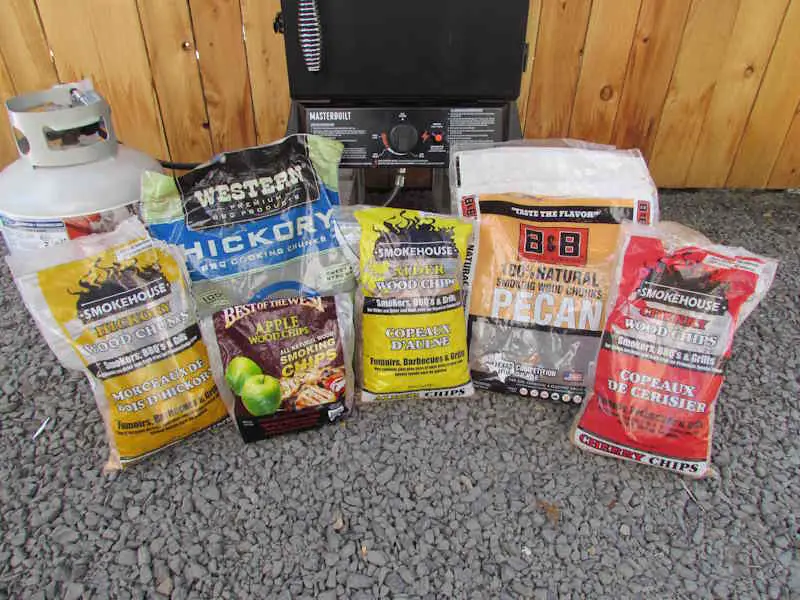
Enhance Flavor With Wood
The choice of wood plays a significant role in the flavor profile of your smoked meats. Different woods, such as hickory, mesquite, apple, and cherry, impart distinct flavors. Experiment with different wood combinations to find your preferred taste.
For more complex smoke flavors, consider trying your hand at experiments by using additional ingredients or a particular smoking sequence that all combine well together. One example of combining flavors that go well together is mesquite wood and rosemary. Another great combination of flavors is fresh garlic and pecan wood, the sweet flavor go well together.
Herbs and spices can also be added to the smoking chips to yield a particular flavor, but be careful to not overdo it. Also, flavored briquets can be purchased ready to use.
If your smoker is not generating enough smoke consider adding a pellet smoke tray or tube. Fill the pellet smoke tray with your favorite variety of wood, light it with a blow torch, wait for it to start smoking, then insert it into the smoker.
Best Smoker Practices
No list of smoker tips would be complete without a list of best practices.
- Rest your meats from 20 to 30 minutes to allow the natural meat juices to redistribute and prevent dry meat.
- Avoid overcrowding to guarantee meat cooks evenly, with adequate air to flow around each piece.
- Regularly check for temperature, too, to avoid overcooking or undercooking the meat.
Now there are always more things you can do but these are smoker tips not to be overlooked.
Consider the Power of Brining
Brining is an excellent technique for adding moisture and flavor to lean cuts of meat. Soaking the meat in a saltwater solution, along with herbs, spices, and other aromatics, helps it retain moisture during the smoking process. This technique is particularly useful for poultry, such as chicken and turkey, which tend to dry out easily.
Brine is made with 1 cup of non-iodized salt and one gallon of water and any spices you prefer, pickling salt work best for brine because it dissolves easily. Make the brine at least 6 hours before use, then refrigerate until it is 40°F or less.
Completely submerge your meat in the brine for 24 hours to allow for the process of osmosis. Rinse all the brine off and add the same seasoning profile to your meat before cooking.
One important note, brining a large piece of meat for a few hours will result in dry meat, allow plenty of time to complete the process.
Wrap With Care
At some point during the smoking process, you may choose to wrap your meat in foil, butcher paper, and even parchment paper. This technique, known as the Texas crutch, helps accelerate the cooking process and lock in moisture.
However, be mindful that wrapping can soften the bark, so use it strategically when needed. For a brisket consider wrapping it when it reaches an internal temperature of 160°F and unwrapping at 180°F.
Practice Proper Food Safety
While indulging in the art of smoking, never compromise on food safety. Always ensure your meat reaches a safe internal temperature to avoid any risks of foodborne illnesses. Familiarize yourself with safe cooking temperatures and use a meat thermometer to ensure your food is thoroughly cooked.
Also, watch out for cross-contamination. The most common way for this to happen is by touching spice bottles, utensils, or dishes after touching raw meat. Pre-mix dry rub in a bowl, wearing disposable gloves, and use different knives for trimming and slicing
Keep a Smoking Journal
Maintaining a smoking journal is a fantastic way to track your experiments, note down successful techniques, and record your favorite recipes. Jot down details such as wood type, cooking time, temperature, and any other observations.
When making changes to a tested cook make an effort to only change one step per cook. If you change multiple steps in a cook you will not be able to tell what worked or what failed.
This journal will serve as a valuable resource, allowing you to refine your smoking skills over time.
Time to Apply These Smoker Tips
To make the most out of your smoker as a beginner, start by taking a look at the numerous techniques, tips, and accessories provided above.
Remember to keep calm and smoke on! Lastly, always remember to take the necessary precautions to ensure you’re smoking safely. Happy Smokin’!
Check out our delicious recipes for an amazing grilling experience.