

As an avid barbecue enthusiast who loves traditional charcoal smoker flavor, I often wondered if I could achieve the same taste with my Masterbuilt electric smoker. Everyone knows that for convenience, an electric smoker can’t be beat. However, the flavor lacks that fire-cooked goodness.
In this blog post, I will share a creative solution I discovered a few years ago to infuse that authentic charcoal-smoked flavor into your Masterbuilt electric smoker. Another added benefit of this method is the appearance of a smoke ring and an authentic BBQ crust.
Let us dive into this method!
Note: most links in this article are Amazon.com Affiliate links, see Affiliate Disclosure, thank you.
The Trick: Utilizing a Cheap Charcoal Grill Tray
I will take you through the step-by-step process of imparting that delicious charcoal flavor to my smoked dishes using an electric smoker. The trick involves using the tray from a cheap charcoal grill.
Procedure:
- Preheating My Electric Smoker: I start by preheating my Masterbuilt electric smoker to the desired temperature. Warming the smoker will cause the air to rise, creating good airflow. The airflow is essential for good burning charcoal and to prevent a bitter smoke flavor from developing in your food.
- Preparing a Charcoal Snake: I lay out a small charcoal snake on the tray. The snake consists of two rows of eight briquettes to create a bed, leaving room for two lighting briquettes on one end. Then I place a single row of eight briquettes on this bed, down the center. This arrangement ensures a steady infusion of charcoal smoke throughout the smoking process. Tip: using less charcoal on your first attempt is a best practice.
- Adding Wood Chips: To enhance the smoky flavor, I place a large wood chip between each briquette on the upper row of the charcoal snake. Also, I add two large wood chips where I place the lighting briquettes. These wood chips will catch fire quickly, achieving a fast start for the charcoal and adding extra smokey flavor.
- Lighting the Charcoal: Start a charcoal chimney with 7 or 8 briquettes, which will take 10 to 15 minutes. Once the briquettes are burning well, I fill in the end of the charcoal snake by placing the first two lite briquettes on the bottom and two more to complete the top row. Then, place the extra charcoal on either side of the lit briquettes to add extra heat. Tip: sort through the briquettes for the well-lit ones and use them first.
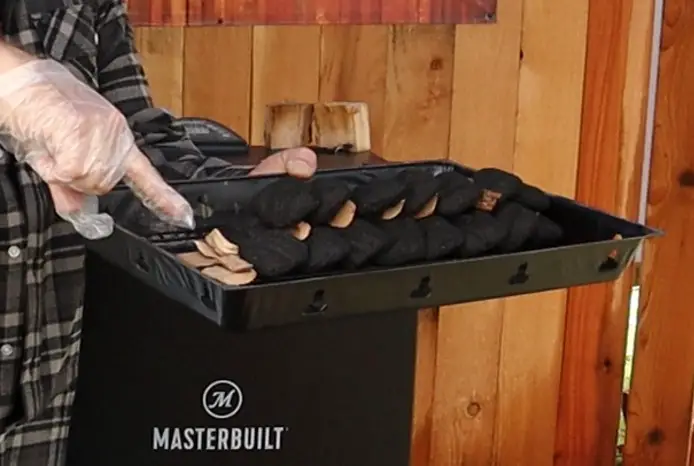
- Placing the Tray in My Electric Smoker: The crucial step involves placing the tray with the charcoal snake into my electric smoker on the bottom rack. I ensure a gap between the tray and the smoker’s sides for proper airflow. Tip: shift the lit side of the tray further away from the side of the smoker.
- Optimizing Airflow: Use a disposable foil tray on the shelf above the charcoal tray to disperse heat and smoke. Sift the foil tray in the opposite direction from the charcoal burning tray. Later in the cooking process, I slide the two trays in the opposite direction to achieve the same effect, but in the reverse direction.
- Adding Ribs to My Smoker: With the setup ready, I place my meat on the smoker grate above the foil pan. If the meat has a thinner side, I usually orient it toward the lit charcoal. However, ensure it is completely above the foil pan, so smoke and heat do not have a straight path to your meat.
- Monitoring Temperature: I use thermometer probes to keep track of the cooking temperature. It is important to note that this method will cause your smoker’s thermometer to read incorrectly. The actual temperature inside the smoker will run lower than the gauge reading, emphasizing the importance of using thermometer probes. Also, the charcoal snake tends to increase in temperature until it is completely lit, and then it will slowly reduce in temperature.
- Enjoying the Results: After a couple of hours, my electric smoker consistently maintains a temperature of over 250°F, and the meat is infused with a rich charcoal smoke flavor.
Tip: Once the charcoal is used, consider removing the whole tray and turning the smoker off for five minutes. This allows the smoker to rest, and then the smoker’s digital control will perform more accurately.
The Charcoal Grill Tray
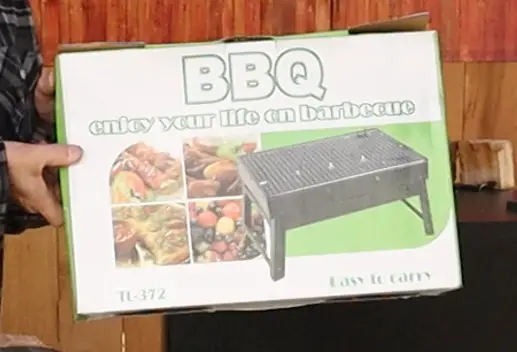
When selecting a charcoal grill, there are two primary considerations: whether it will fit and cost.
When trying to find a grill tray that will fit, start with the shelf measurement. The Masterbuilt 140b smoker I use has four shelves measuring 19.69″ x 12.2″.
The generic budget grill I selected has total dimensions of 17″ X 11.5″ x 8.5″. However, the grill charcoal tray is roughly 17″ x 11.5″ x 1.5″, which is a perfect fit in the Masterbuilt 40″ electric smoker.
See The Charcoal Grill on Amazon.com
Budget-Friendly Charcoal Tray
If you want a cheaper option, go for something basic, like a cookie sheet with a cooling rack. I used to use a cookie sheet with a cooking rack.
The cooling rack is great because it lifts the charcoal off the cookie sheet. This helps the airflow around the burning briquettes. To get even more airflow, you can drill holes ½ inch wide every two inches along the side of the sheet pan. This will make your budget charcoal tray complete!
After twenty or more uses, the pan will start to fail. Usually, the cooling rack will separate and warp until it no longer holds the charcoal correctly. Do not fear; at this price, it is easy to replace.
See A Budget Cookie Sheet on Amazon.com
Conclusion:
If you want to add that traditional charcoal smoked taste to your dishes using a Masterbuilt electric smoker, try my creative solution involving a cheap charcoal grill tray. With a few simple steps, you can elevate your smoking experience and enjoy the best of both worlds – the convenience of an electric smoker and the classic flavor of charcoal.
Note: Make sure to check your specific electric smoker’s guidelines and adjust the method accordingly based on your own experiences.